WebRTCブログ第一回

はじめまして!OISの自社製品『ReDois』開発担当です。
『ReDois』は、WebRTCと呼ばれる技術を利用し、リアルタイム配信を実現しています。
私からは、このWebRTCに関する情報について発信していこうと思います。
今回は、WebRTCの基本として、P2Pでの接続について解説します。
WebRTC公式より公開されているサンプルページを使い、ソースコードの解説も交えながら見ていこうと思います。
ソースコードはこちらになります。
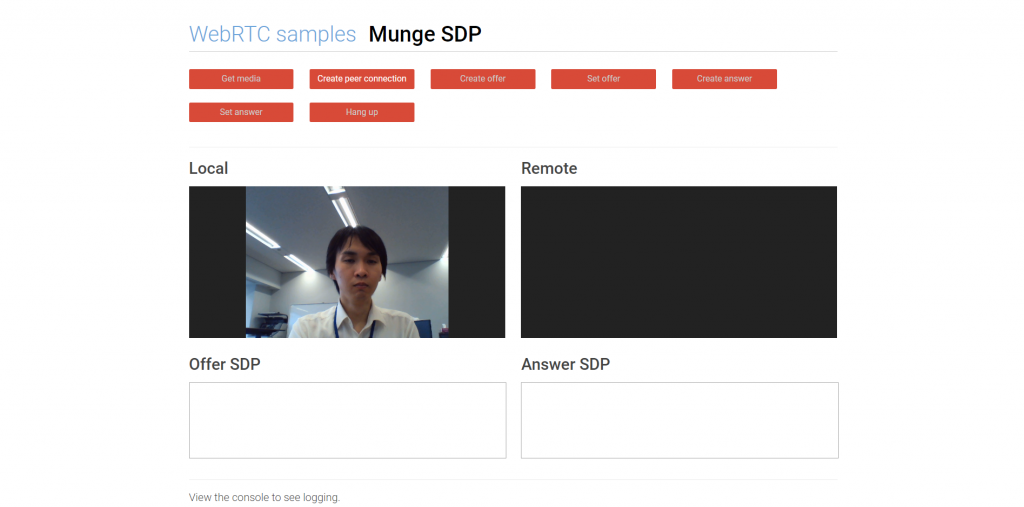
このサンプルページでは、左上から順にボタンを押していけば自分同士でWebRTC接続ができるようになっています。
それぞれのボタンを押したとき、具体的にどのような動作をしているのか掘り下げていきましょう。
①[Get media]ボタン
最初に、マイクやカメラからストリームを取得し、それを画面に表示します
  async function getMedia() {
    (中略)
    try {
      const userMedia = await navigator.mediaDevices.getUserMedia(constraints);
      gotStream(userMedia);
    } catch (e) {
      console.log('navigator.getUserMedia error: ', e);
    }
  }

  function gotStream(stream) {
    console.log('Received local stream');
    localVideo.srcObject = stream;
    localStream = stream;
  }
具体的には、
navigator.mediaDevices.getUserMedia()メソッドでMediaStreamオブジェクトを取得し、これを画面上のvideo要素にセットすることによってマイクやカメラの音声・映像をブラウザ上で再生することができます。
(サンプルページでは、localVideoが示すvideo要素はmuted属性を持っているので音声は再生されません)
②[Create peer connection]ボタン
WebRTC接続の要となるオブジェクトである、RTCPeerConnectionオブジェクトを作成します。
  function createPeerConnection() {
    (中略)
    const servers = null;


    window.localPeerConnection = localPeerConnection = new RTCPeerConnection(servers);
    console.log('Created local peer connection object localPeerConnection');
    localPeerConnection.onicecandidate = e => onIceCandidate(localPeerConnection, e);
    sendChannel = localPeerConnection.createDataChannel('sendDataChannel', dataChannelOptions);
    sendChannel.onopen = onSendChannelStateChange;
    sendChannel.onclose = onSendChannelStateChange;
    sendChannel.onerror = onSendChannelStateChange;

    window.remotePeerConnection = remotePeerConnection = new RTCPeerConnection(servers);
    console.log('Created remote peer connection object remotePeerConnection');
    remotePeerConnection.onicecandidate = e => onIceCandidate(remotePeerConnection, e);
    remotePeerConnection.ontrack = gotRemoteStream;
    remotePeerConnection.ondatachannel = receiveChannelCallback;

    localStream.getTracks()
      .forEach(track => localPeerConnection.addTrack(track, localStream));
    console.log('Adding Local Stream to peer connection');
  }
今回は自分同士での接続なので、ローカル・リモート共にこの場でRTCPeerConnectionオブジェクトを作成しています。
RTCPeerConnectionオブジェクトを作成する他に、①で取得したMediaStreamオブジェクトからMediaStream.getTracks()メソッドでMediaStreamTrackオブジェクトを取得し、RTCPeerConnection.addTrack()メソッドでこれから送信する音声・映像をセットしています。
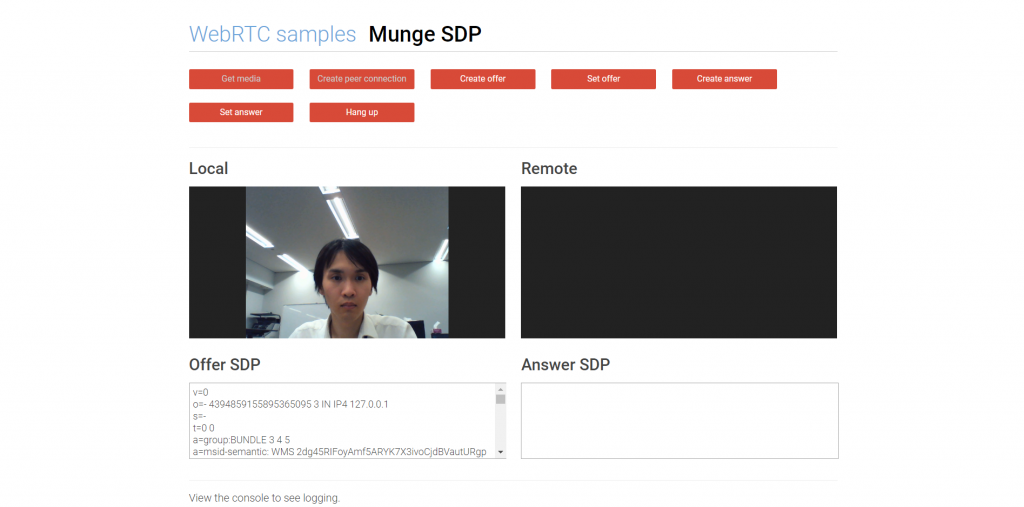
③[Create offer]ボタン
SDPと呼ばれる文書をoffer側(今回はローカル側)で作成します。SDPについての詳細な説明は今回省きますが、WebRTC接続にはお互いの内部情報をやりとりする必要があり、SDPはそれを表現するプロトコルです。
 async function createOffer() {
    try {
      const offer = await localPeerConnection.createOffer(offerOptions);
      gotDescription1(offer);
    } catch (e) {
      onCreateSessionDescriptionError(e);
    }
  }
function gotDescription1(description) {
    offerSdpTextarea.disabled = false;
    offerSdpTextarea.value = description.sdp;
  }
SDP offerはRTCPeerConnection.createOffer()メソッドで作成します。
ここでは更に、作成したSDPをtextarea要素で表示しています。
④[Set offer]ボタン
作成したSDP offerをRTCPeerConnectionオブジェクトにセットします。
async function setOffer() {
    let sdp = offerSdpTextarea.value;
    const offer = {
      type: 'offer',
      sdp: sdp
    };
    console.log(`Modified Offer from localPeerConnection\n${sdp}`);

    try {
      // eslint-disable-next-line no-unused-vars
      const ignore = await localPeerConnection.setLocalDescription(offer);
      onSetSessionDescriptionSuccess();
    } catch (e) {
      onSetSessionDescriptionError(e);
    }

    try {
      // eslint-disable-next-line no-unused-vars
      const ignore = await remotePeerConnection.setRemoteDescription(offer);
      onSetSessionDescriptionSuccess();
    } catch (e) {
      onSetSessionDescriptionError(e);
    }
  }
ローカル側はRTCPeerConnection.setLocalDescription()、リモート側はRTCPeerConnection.setRemoteDescription()でSDP offerをセットします。
今回は自分同士の接続なので気にしなくてよいのですが、本来リモートはSDP offerを知らないはずなので、SDPを伝達するためにシグナリングサーバーと呼ばれるものが必要になってきます。これについては次回以降で詳しく解説する、かも…?
また、SDP offerをセットした後、リモート側のonTrackイベントが発火します。イベント発火時の処理gotRemoteStream()は②でリモート側に設定しています。
function gotRemoteStream(e) {
    if (remoteVideo.srcObject !== e.streams[0]) {
      remoteVideo.srcObject = e.streams[0];
      console.log('Received remote stream');
    }
  }
onTrackイベントが発火すると、通信相手が送信するMediaStreamオブジェクトの配列を受け取れるので、それをリモート側のvideo要素にセットしています。
ただし、この時点ではWebRTC接続が確立されていないので、セットした音声・映像が再生されることはありません。
⑤[Create answer]ボタン
SDPをanswer側(今回はリモート側)で作成します。
offerとanswerについての説明も次回以降をお楽しみに…!!
async function createAnswer () {
   (中略)
    try {
      const answer = await remotePeerConnection.createAnswer();
      gotDescription2(answer);
    } catch (e) {
      onCreateSessionDescriptionError(e);
    }
  }
function gotDescription2(description) {
    answerSdpTextarea.disabled = false;
    answerSdpTextarea.value = description.sdp;
  }
SDP answerはRTCPeerConnection.createAnswer()メソッドで作成します。
③同様、作成したSDPをtextarea要素で表示しています。
⑥[Set answer]ボタン
作成したSDP answerをRTCPeerConnectionオブジェクトにセットします。
async function setAnswer() {
    let sdp = answerSdpTextarea.value;
    const answer = {
      type: 'answer',
      sdp: sdp
    };

    try {
      // eslint-disable-next-line no-unused-vars
      const ignore = await remotePeerConnection.setLocalDescription(answer);
      onSetSessionDescriptionSuccess();
    } catch (e) {
      onSetSessionDescriptionError(e);
    }

    console.log(`Modified Answer from remotePeerConnection\n${sdp}`);
    try {
      // eslint-disable-next-line no-unused-vars
      const ignore = await localPeerConnection.setRemoteDescription(answer);
      onSetSessionDescriptionSuccess();
    } catch (e) {
      onSetSessionDescriptionError(e);
    }
  }
ローカル側はRTCPeerConnection.setRemoteDescription()、リモート側はRTCPeerConnection.setLocalDescription()でSDP answerをセットします。
ここまで完了すると後はWebRTCが勝手に接続試行を行ってくれ、成功するとリモート側のvideo要素で音声・映像の再生が始まります。
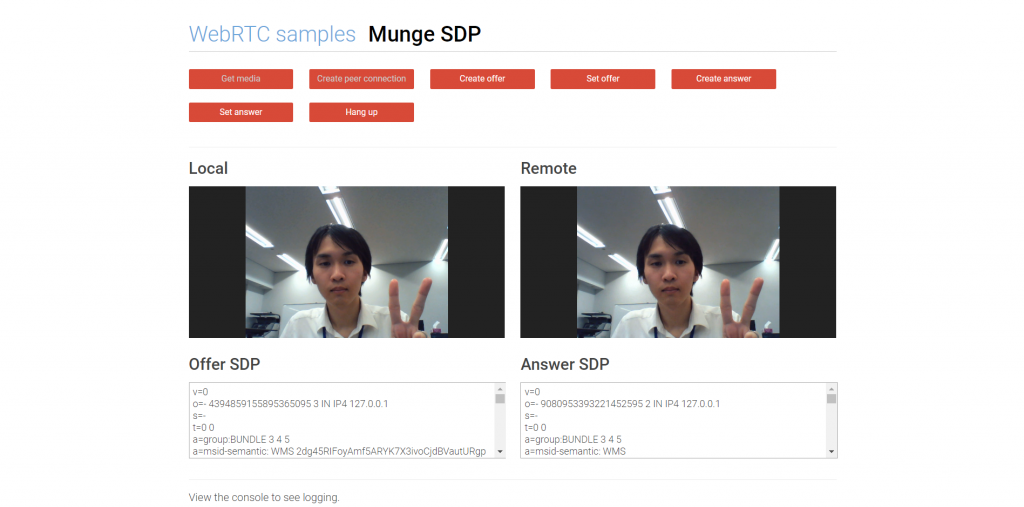
接続成功!
⑦[Hang up]ボタン
WebRTC接続を終了します。
function hangup() {
    remoteVideo.srcObject = null;
    console.log('Ending call');
    localStream.getTracks().forEach(track => track.stop());
    sendChannel.close();
    if (receiveChannel) {
      receiveChannel.close();
    }
    localPeerConnection.close();
    remotePeerConnection.close();
    (以下略)
ローカル・リモート共にRTCPeerConnection.close()メソッドでWebRTC接続を閉じます。
お疲れ様でした。
さて、いかがでしたでしょうか。
単純なP2Pであれば、WebRTCは誰でも簡単に利用することができる優れものです。
今後も『ReDois』やWebRTCについて継続的に発信していきます。
お楽しみに!
![]()